Patikrinimas, ar „Windows 10/11“ (24H2 arba 25H2 atnaujinimas) yra pilnai ir švariai įdiegta (be pažeidimų, trūkstamų failų ar dalinių atnaujinimų), susideda iš trijų patikrinimo lygių:
1️⃣ Versijos ir rinkinio (build) patvirtinimas
2️⃣ Komponentų saugyklos ir sistemos vientisumo testai
3️⃣ „Windows Update“ ir aptarnavimo (servicing) būklės žurnalai
Žemiau pateiktas išsamus, žingsnis po žingsnio patikrinimo būdas.
1. Patikrinkite įdiegtą versiją ir rinkinio numerį
Tikslas: įsitikinti, kad iš tikrųjų naudojate 24H2 arba 25H2, o ne dalinį diegimą.
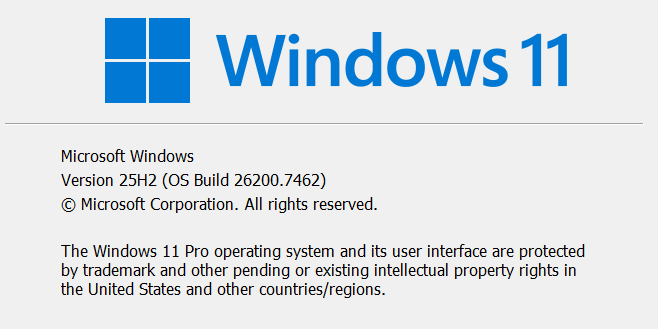
1 variantas — naudojant winver
- Paspauskite Win + R
- Įveskite:
winver
Pamatysite:
- Versija 24H2 → rinkinio numeris ~26100.xxx
- Versija 25H2 → dažniausiai rinkinio numeriai ≥26200.xxx
✅ Pavyzdinis rezultatas:
Windows 10
Version 22H2 (OS Build 19045)

Windows 11
Version 24H2 (OS Build 26100.2314)
2 variantas — naudojant „PowerShell“
Vykdykite:
Get-ComputerInfo | Select-Object OsName, OsVersion, OsBuildNumber, WindowsVersion
arba:
systeminfo | findstr /B /C:"OS Version" /C:"System Boot Time"
Tikėtinas rezultatas:
OS Version: 10.0.26100
👉 Jei OsBuildNumber yra 26100 ar didesnis — Windows 11 v. 24H2 yra įdiegta.
2. Patikrinti, ar nėra trūkstamų ar sugadintų sistemos failų
A žingsnis — „System File Checker“ (SFC)
Atidarykite Command Prompt (Admin) ir vykdykite:
sfc /scannow
Ką tai daro: patikrina visus apsaugotus „Windows“ failus ir pakeičia trūkstamus ar sugadintus.
✅ Rezultatų reikšmės:
- „Windows Resource Protection did not find any integrity violations“ → viskas gerai
- „Found corrupt files and successfully repaired them“ → nedidelė problema, ištaisyta
- „Found corrupt files but could not repair some“ → tęskite su DISM (žemiau)
B žingsnis — DISM (Deployment Image Servicing and Management)
Vykdykite šias komandas iš eilės (Command Prompt (Admin) arba PowerShell):
DISM /Online /Cleanup-Image /CheckHealth
DISM /Online /Cleanup-Image /ScanHealth
DISM /Online /Cleanup-Image /RestoreHealth
/CheckHealth→ greita patikra, ar yra pažymėtų pažeidimų/ScanHealth→ išsamesnė analizė/RestoreHealth→ sistemos atvaizdo taisymas naudojant „Windows Update“ arba vietinius šaltinius
✅ Tikėtinas rezultatas:
The restore operation completed successfully. The component store corruption was repaired.
Jei nepavyksta, patikrinkite žurnalą:%windir%\Logs\DISM\dism.log
3. Patikrinti „Windows“ aptarnavimo ir atnaujinimų būklę
A. „Windows Update“ istorija
Atidarykite:
Settings → Windows Update → Update history
Ieškokite:
- „Feature update to Windows 11, version 24H2 (arba 25H2)“ – pažymėta kaip Successfully installed
- Nėra Failed ar Retry įrašų
B. Aptarnavimo paketo ir komponentų saugyklos būklė
Vykdykite:
DISM /Online /Cleanup-Image /AnalyzeComponentStore
Jei rezultatas rodo:
- „No component store corruption detected.“
- „Component Store Cleanup Recommended: No“
👉 Sistemos atvaizdas yra švarus.
4. Papildomi (išplėstiniai) patikrinimai
A. Įkrovos konfigūracijos ir disko būklė
Vykdykite:
chkdsk C: /scan
Tikėtinas pranešimas:
Windows has scanned the file system and found no problems.
B. Atkūrimo ir sistemos skaidinių patikra
Vykdykite:
Get-Partition
Get-Volume
Įsitikinkite, kad EFI, Recovery ir OS skaidiniai egzistuoja ir nėra pažymėti kaip RAW ar trūkstami.
C. Patikimumo monitorius (Reliability Monitor)
Vykdykite:
perfmon /rel
👉 Parodo klaidas po atnaujinimo ar diegimo nesėkmes
(ieškokite raudonų X ženklų aplink atnaujinimo datą).
5. Patikrinimas per „Windows Event Log“
Norėdami įsitikinti, kad diegimas pilnai užbaigtas:
Event Viewer → Applications and Services Logs →
Microsoft → Windows → WindowsUpdateClient → Operational
Filtruokite pagal:
- Event ID 19 – „Installation successful“
- Event ID 44 – „Restart required“
(ieškokite įrašų apie atnaujinimo datą)
✅ Santrauka: „Windows 24H2 / 25H2“ sistema turi rodyti
| Patikra | Rezultatas |
|---|---|
winver arba Get-ComputerInfo | Versija 24H2 / 25H2, Build ≥26100 |
sfc /scannow | Nėra vientisumo pažeidimų |
DISM /ScanHealth | Pažeidimų nerasta |
DISM /RestoreHealth | Sėkmingai užbaigta |
| Atnaujinimų istorija | Funkcinis atnaujinimas sėkmingas |
| Komponentų saugykla | Švari, nereikia valymo |
chkdsk /scan | Nėra failų sistemos klaidų |